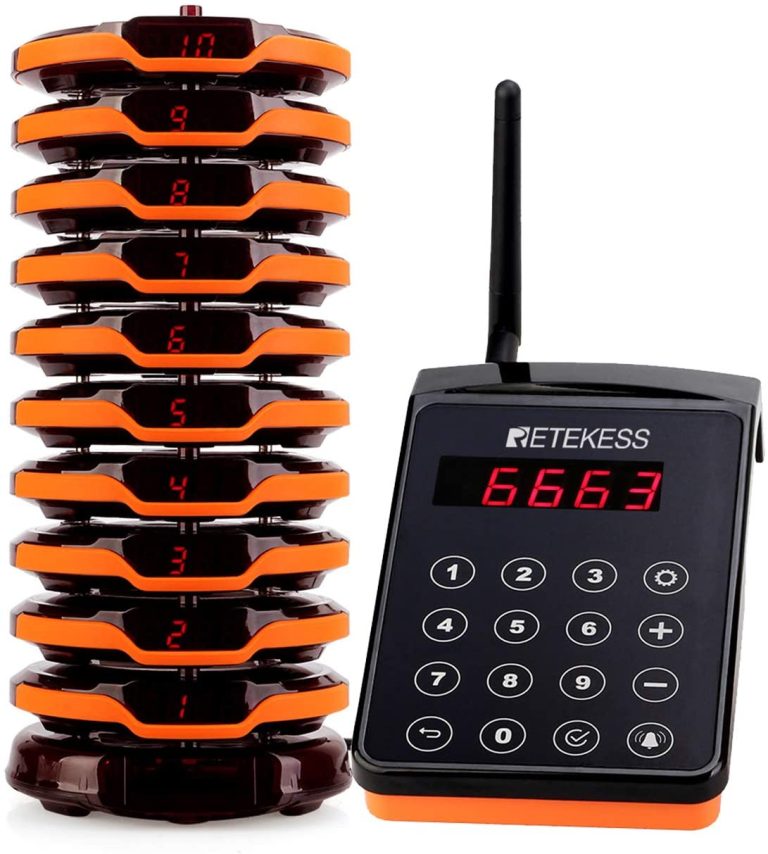
Powering the Coaster pager on and off
- When the biper is off, place it on the tray the load to turn it on.
- When the biper is on, place it on the tray the load, press “0” and the CALL button to turn it off.
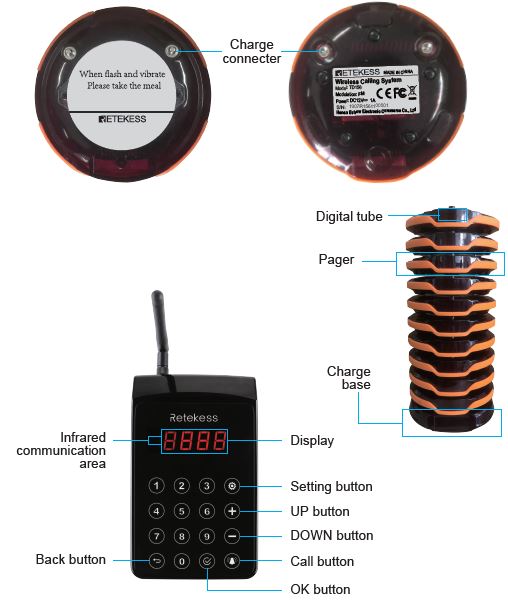
Function interface
Press the SETTING button to access by the password authentication interface, the screen
displays “–“, waiting for the password to be entered. The default password is “2580”. After entering the password to access the function interface, “F1” is displayed on the screen and flashes. After entering the number or pressing the button “+” to select a function, press the button ENTER to validate When the setting is complete, press the SETTING button to return to the Home screen.
Functions
- To set the vibration/ringing/LED flash duration (F0)
After accessing interface the function F0 , enter the two-digit number “00” or “05-99”. The number is the duration in seconds of the vibration/ the buzzer/LED flash. The number cannot be set to “01-04” because the duration is too short. The minimum time is 5 seconds. When the setting is 00, it means that there is no time limit. When the Vibration/Buzzer/LED Flash function is disabled, it will not disable their current setting and will always follow the procedures from F2 to F4. - Definition the ID for Coaster Pager (F1)
After accessing the F1 function interface, enter the two-digit ID (not “99”) for your pager and press the CALL button. Form the moment, the keyboard display is flashing. Place the pager approximately 10 cm just above the infrared communication device on the keypad. If there is a buzzer and the LED flashes on the pager, It means the operation was successful (Moreover, you can set it up at any time after you remove the pager from the loading tray).
Notice : After the modification any parameter in the keypad setting, it is necessary to reset a new ID number if you want apply the new setting to the pager. - Setting the LED flash mode for the pager (F2)
After accessing the F2 function interface, the display shows the mode Flash LED current and you can select the desired mode:
0 : disabled ;
1 : SLOW ;
2 : NEUTRAL ;
3 : FAST.
When you enter the number and press the ENTER button, the keyboard will beep at the same time, which means that it is done. - Setting the buzzer announcement mode (F3)
After accessing the F3 function interface, the display shows the current announcement mode and you can select the desired mode :
0 : disabled ;
1 : SLOW ;
2 : NEUTRAL ;
3 : FAST.
When you enter the expected number and press the ENTER button, the keyboard beeps at the same time, which means that it is done. - Réglage du mode de vibration (F4)
After accessing the F4 function interface, the display shows the current vibration mode and you can select the desired mode:
0 : disabled ;
1 : SLOW ;
2 : NEUTRAL ;
3 : FAST.
When you enter the expected number and press the ENTER button, the keyboard beeps at the same time, which means that it is done. - Setting of the hour the alarm time in case of overflow (F5)
Après avoir accédé à l’interface de fonction F5, l’écran affiche le temps d’alarme actuel après dépassement et vous pouvez sélectionner le temps souhaité. When the pager is out of transmission range of the keypad for a period of time, it triggers an alarm. The pager displays “99” with vibration and flashing. The time can be set on 0-30 minutes (0 means the alarm is off. And the other number represents the time, after which what the alarm starts to be triggered.). - Réglage du compte à rebours du service (F6)
After accessing the F6 function interface, the display shows the countdown of the current service and you can select the desired countdown (0-99 minutes). 0 is for disable the function, while the other figure means that the pager will remind the guest to take the meals after a of countdown interval when it receives messages from the keyboard.
After the countdown reminder, it is only when the Pager is placed on the charging tray connected to the power supply that the notification is closed. When it sends the notification, the pager vibrates and flashes constantly and the disk ID appears on the screen. - Setting the channel value (F7)
After accessing the F7 function interface, the display shows the current channel and you can select the desired channel (channel 1-99, each number represents a channel). When you enter the expected number and press the ENTER button, the keyboard beeps at the same time, which means that it is done.
Notice : It is necessary to configure a new ID after changing the pager channel. - Frequency setting (F9)
After accessing the F9 function interface, the display shows the current frequency and you can select the desired frequency (Channel 01-31, each number represents a frequency). When you enter the expected number and press the ENTER button, the keyboard beeps at the same time, which means that it is done.
Notice: It is necessary to set up a new ID for all disks after the frequency has been changed for the backpedal beep.