Tickets import lets you create or activate tickets in bulk from a spreadsheet (.csv, .xlsx, .ods, etc.) without using the till.
Access
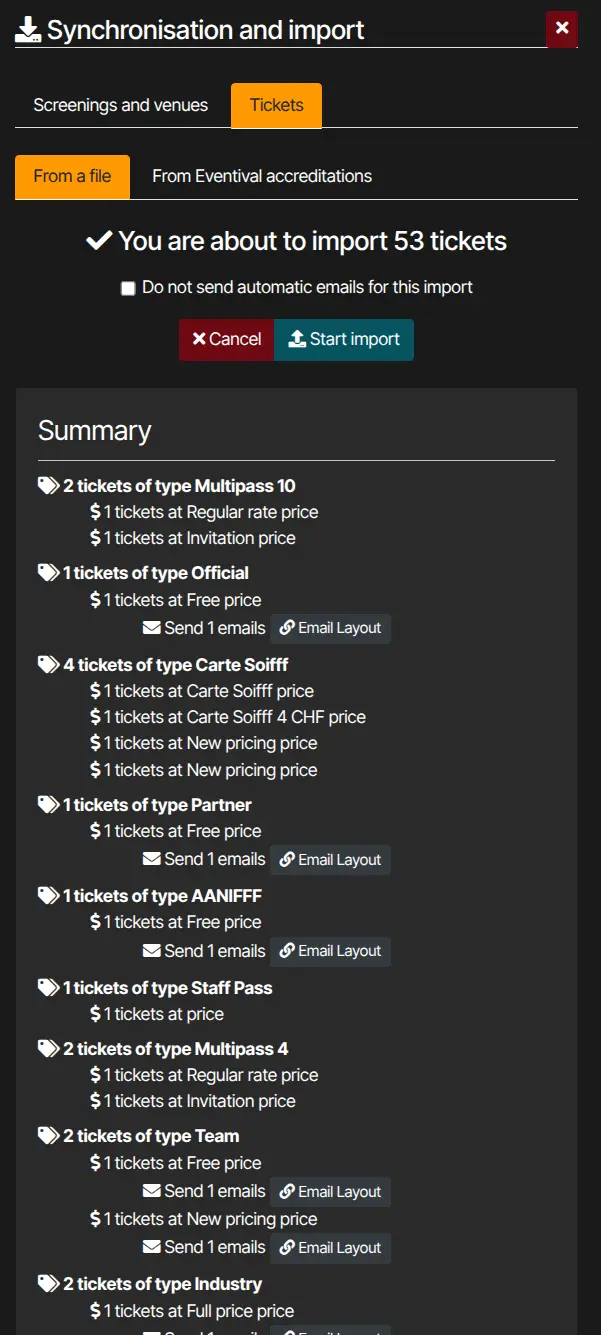
Sign in to Kronos. In the sidebar, open Synchronisation and import, then the Tickets tab and From a file.
Steps
- Download the template — Download template (sample Excel with expected columns: number, ticket type, price, title, first name, last name, e-mail, address, screening, seat, etc.).
- Prepare the file — one row per ticket (or per batch via the Number column). Ticket type and price ids must match your Kronos setup.
- Choose the file — pick your file (Supported formats: .csv, .xls, .xlsx, .ods, .numbers).
- Verification — Kronos validates the file:
- errors: You have X error(s) in your import file, line-by-line detail (Preview) — fix and re-upload;
- OK: You are about to import X tickets, breakdown by type, price and screening (Summary / Preview).
- Automatic e-mails on import — if ticket types have e-mail layouts configured (below), tick Do not send automatic emails for this import to skip them for this batch only.
- Run import — Start import. The result lists created, updated, activated and invalid tickets.
E-mails on import
On each ticket type, E-mails tab, map an e-mail layout to On activation (and optionally On creation) for the relevant price. Activated tickets during import trigger those e-mails unless you use Do not send automatic emails for this import.
After import: bulk actions
To find the batch: Operation → Tickets (/tickets). Under Filter on imports, use Tickets created during the import of (or Tickets activated during the import of) and pick the batch timestamp.
Select tickets to run bulk actions:
- Send an e-mail
- Generate PDF
- Credit wallet (if enabled)