Installation et mise à jour de l’application
The devices supplied for the use of the ticketing interface are usually preconfigured by us before delivery. In the event that we need to provide you with additional hardware or that an update needs to be performed, you will find below the necessary instructions for the installation and update of the scanning application.
-
On iOS devices and Android devices that have the Play Store, simply install the Net Oxygen Ticketack app from the app store.
-
You can then start the application and configure it using the instructions in the next paragraph.
Configuration de l’application du point de vente
Once the POS application is installed and/or updated, you can configure it by scanning a configuration QR code that can be obtained from the Ticketack administration interface. You will need to be logged in with an administrator account on another device, click on your name and choose “Configure Terminals” from the menu.
Then choose the “Input Control” tab and select the desired options:
-
langueThe language of the application; -
appareil-photoThe choice of the device to be used to charge the subscriptions; -
sallesallows you to filter the events that will appear in the list of events to be scanned according to the room(s) where the scanner is used.
Identification sur le système
Identify yourself then with the accesses which will have been provided to you by our care or by your ticketing manager.
Accès depuis un ordinateur
You can access the ticketing interface from any computer with an Internet connection and a current web browser (we recommend using Google Chrome or Chromium for optimal compatibility, but other browsers should also work as long as they are up-to-date).
This is especially useful before you receive your equipment to test it and to familiarize yourself with the ticketing interface of sale and reservation.
Connexion
Go to you on https://xxx.ticketack.com/user/login (replace xxx by your ticketing prefix) and identify yourself with the access codes provided to you by us or by your ticketing manager.
Interface de vente
Vente de tickets
The cashier selects for each event one or more rates among the available rates and chooses a payment method in the right part of the interface.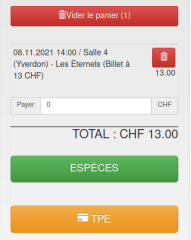
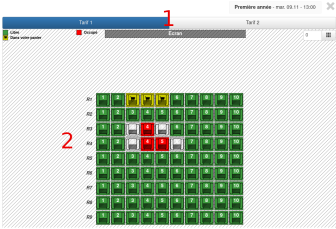
Cas des événements avec plan de salle
-
Choose a rate
-
choose the places
-
-
the places yellow are added to the basket
-
green seats are available
-
the red seats are already sold
-
the grey spaces are not available
-
Vente d’abonnements
Subscriptions (if available) can be sold from the subscription tab of the store.
Vente d’articles
The cashier will choose from the available tabs the type of item he wants to sell.

We also have a dedicated sales interface for bars, restaurants and stores that do not sell tickets.
Réservation sur un abonnement
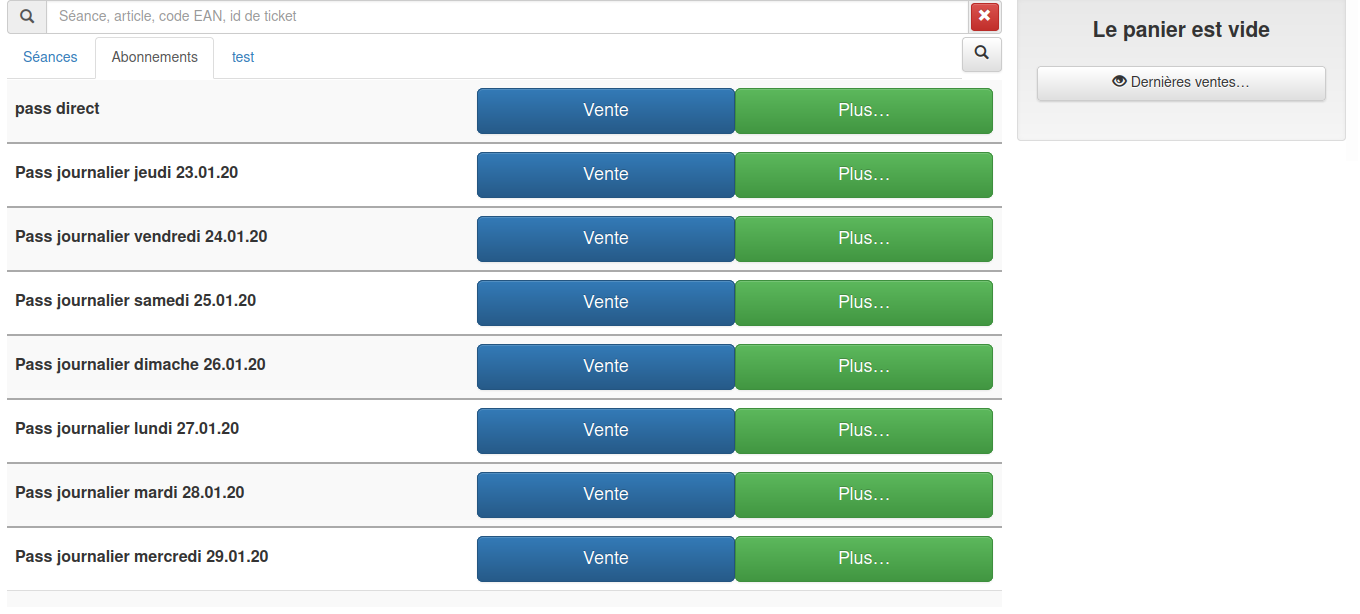
Subscriptions (if available) can be sold from the subscription tab of the store.

Choose a rate from the rate card.
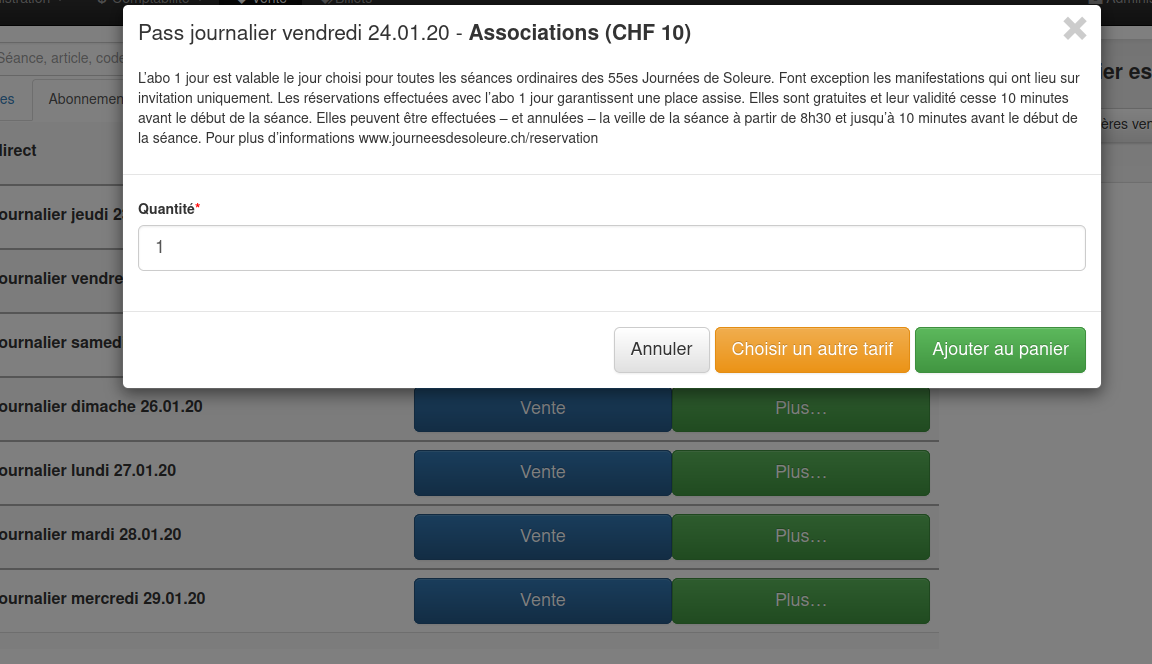
Fill in the fields.
Recherche d’un abonnement
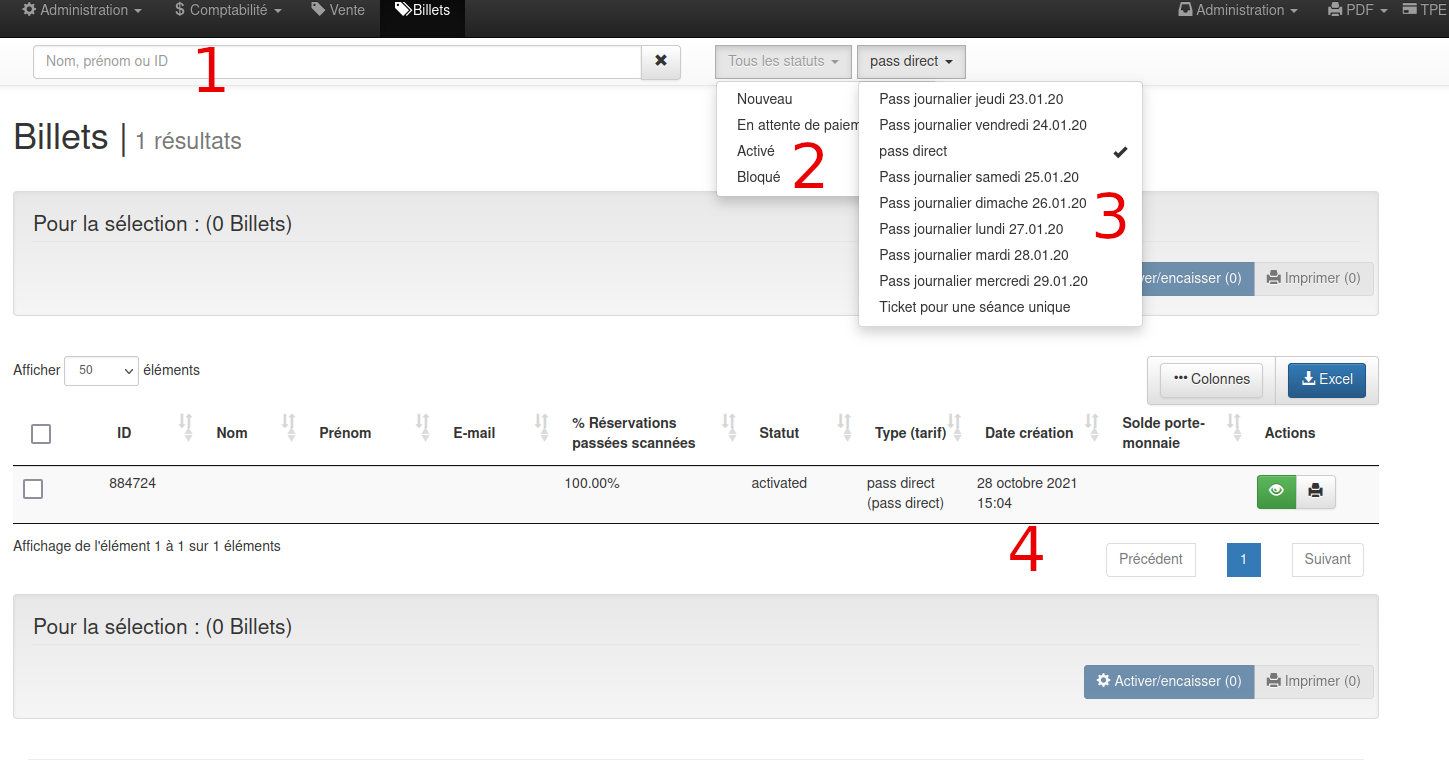
-
search by last name, first name or ID
-
search by status
-
search by all types (except single session tickets)
-
list of subscriptions
Remboursement d’une vente
If your user has the role refund, you have the possibility to reimburse any device sale (if you have the roleadmin) or sales made on your current fund (in other cases).
For sales made on your cashs :

click on Last sales…
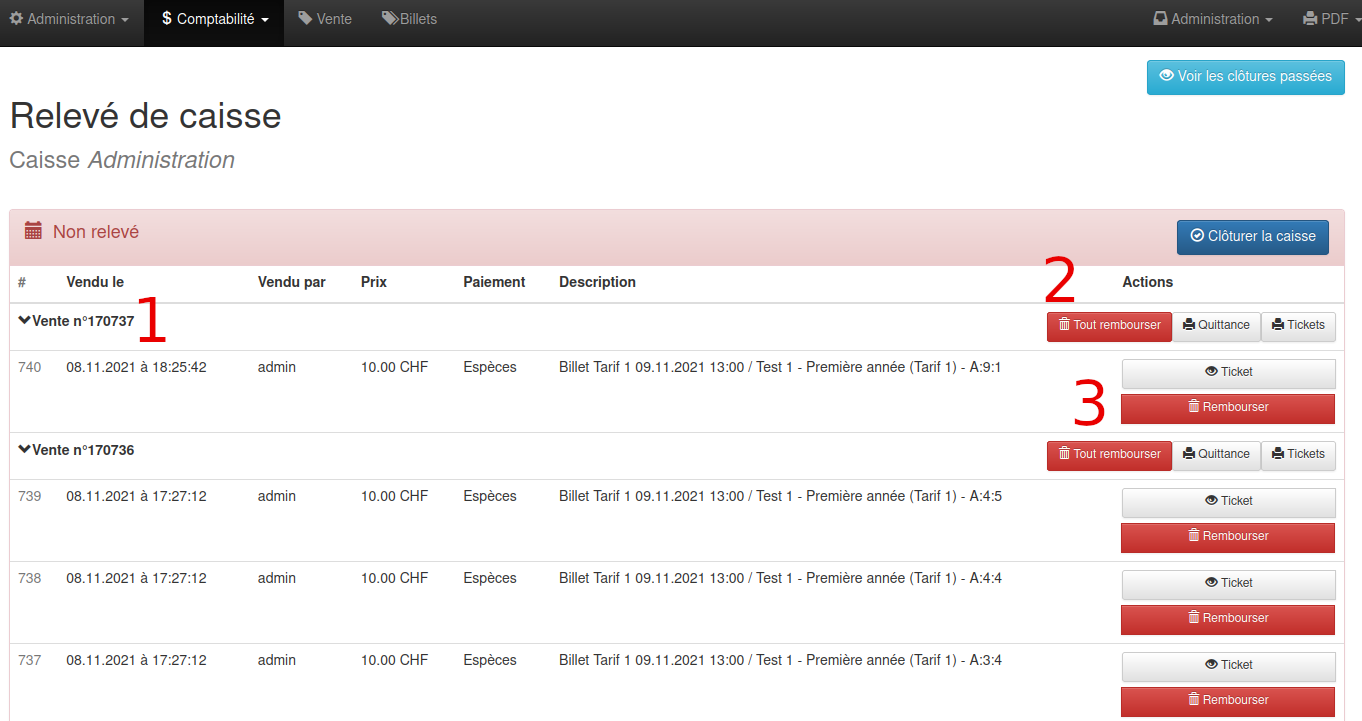
-
Sale number
-
choose to reimburse the entire ticket
-
choose to reimburse a single ticket item
For the admins :
You can use Accounting → Sales Statement
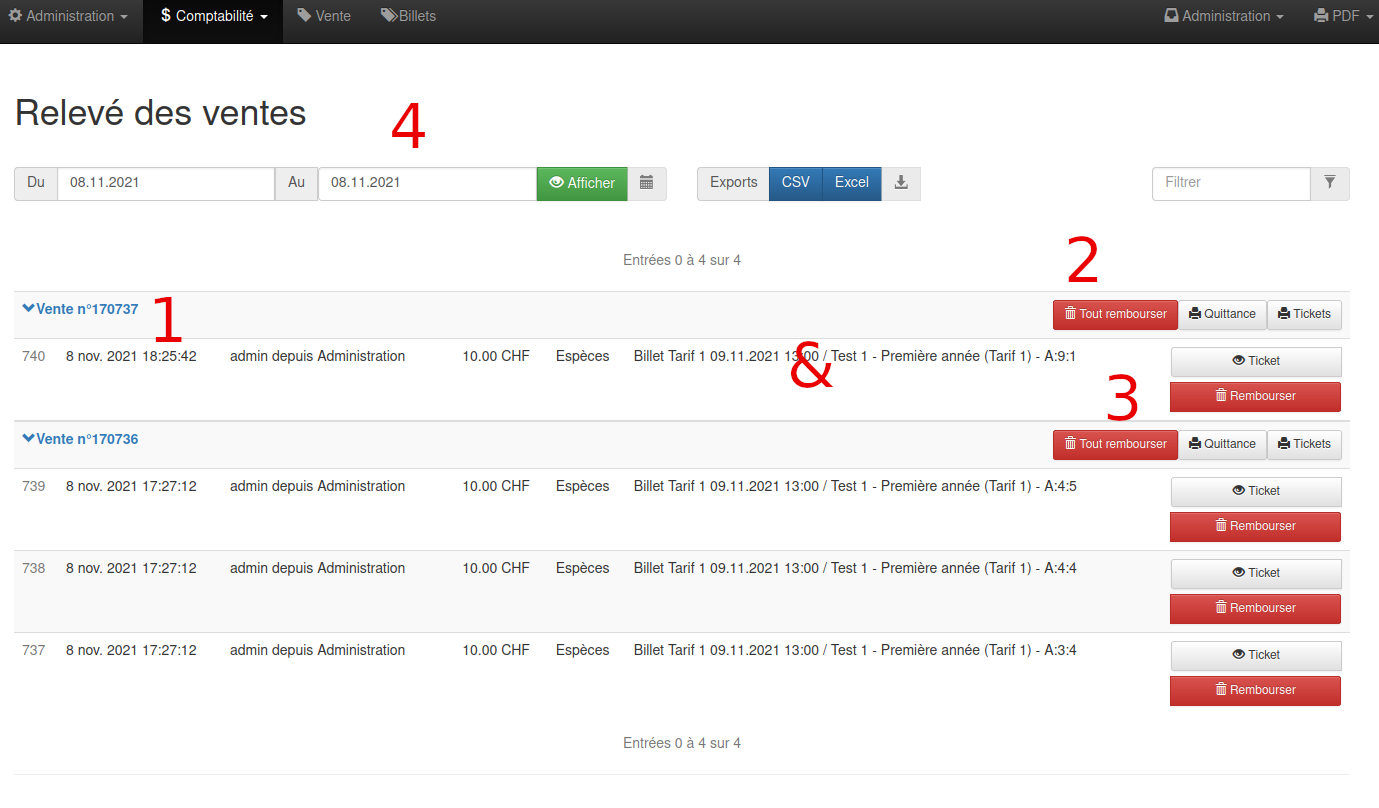
-
Sale number
-
choose to reimburse the entire ticket
-
choose to reimburse a single ticket item
-
possibility to filter the search
Accréditations
If this function is configured for you, accreditations can be imported from Eventival or other systems into Ticketack. They are then available in the menu (“Tickets”) where you can “activate” them if they are not yet paid.
