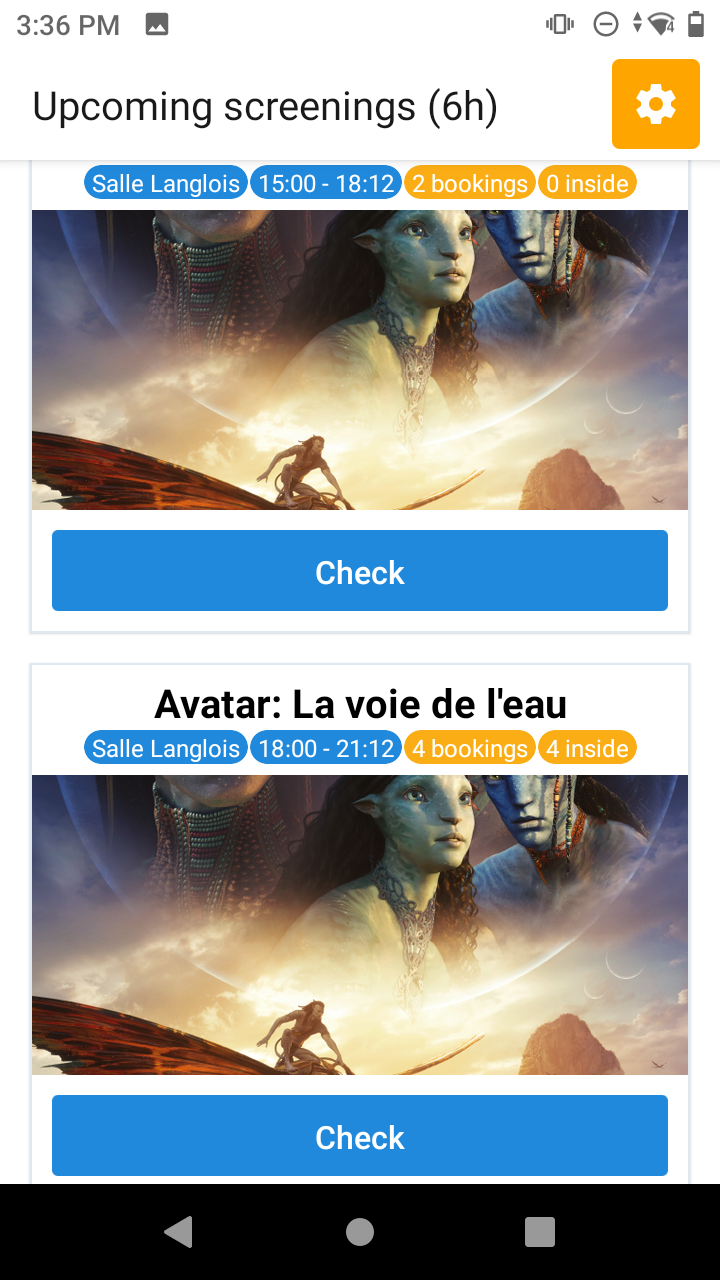
Selecting the event to control
Once the configuration of your scanner is complete, you can control entries using your dedicated scanner (recommended) or your smartphone. On your control device, you have the option to choose the event for which you want to control the entries. As you can see in the illustration below, the events here are cinema sessions. You simply need to select the event you wish to monitor by pressing ‘Control Entries’.
Using of your appareil de scanner
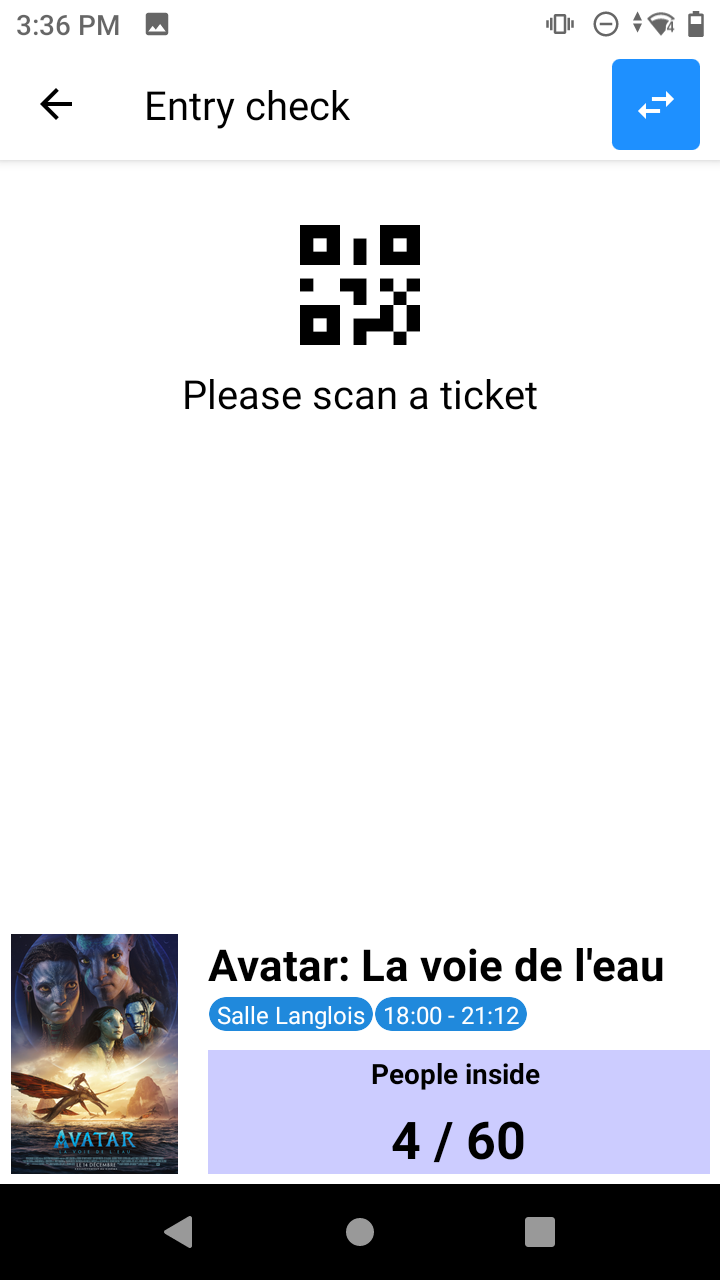
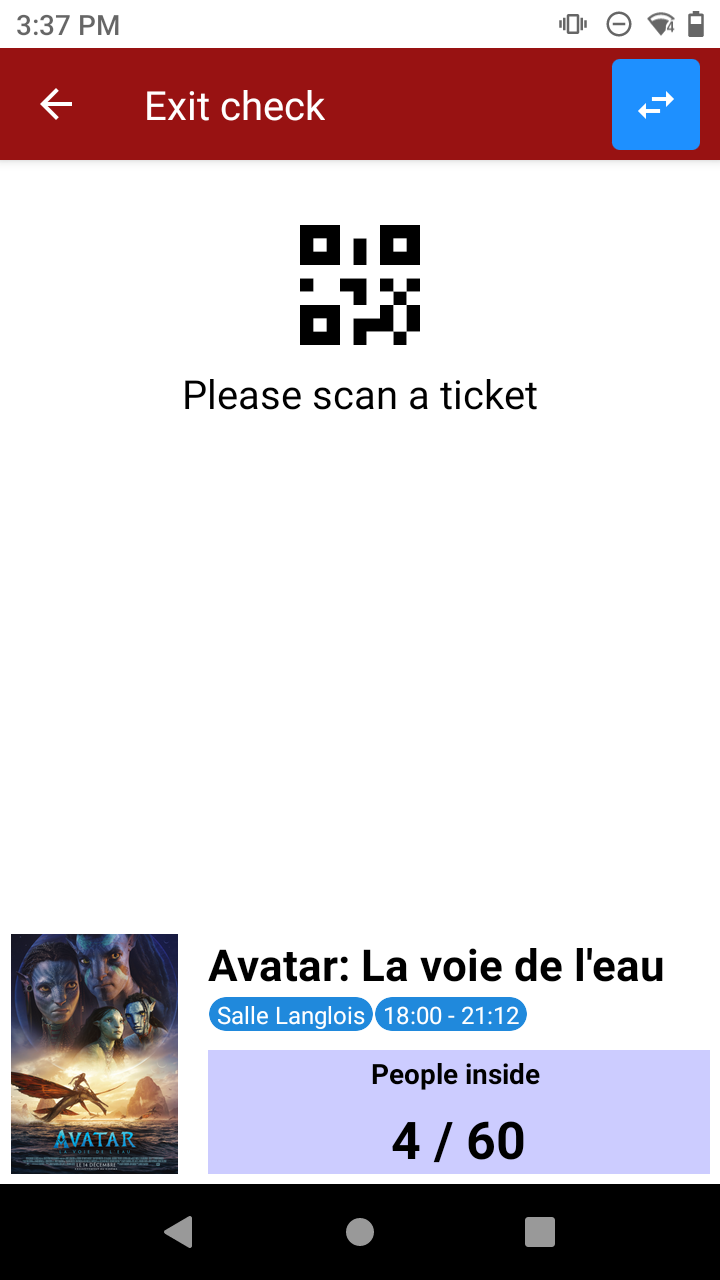
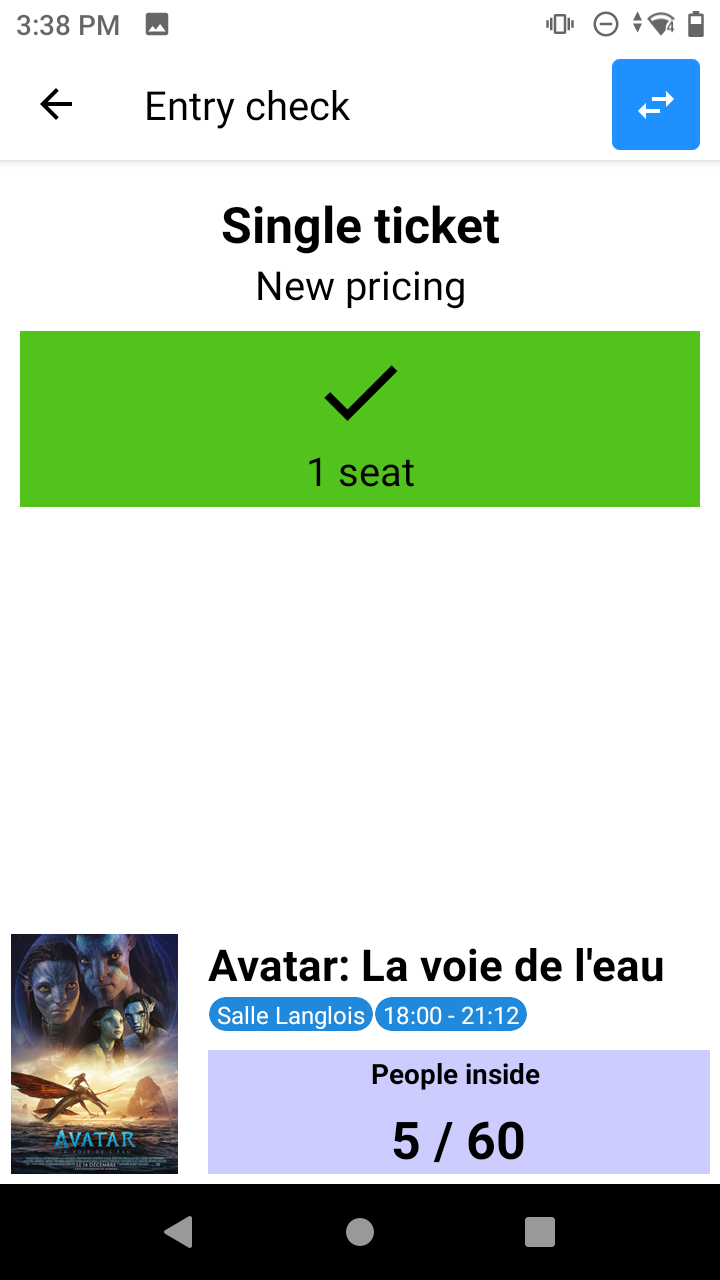
Once the event is selected, the following display appears. The first illustration shows that the scanner is in entry control mode, but you can also switch it to exit control mode
by pressing the small blue square containing two arrows pointing in opposite directions, located in the top right. You will then see the top bar turn red, indicating the ‘Exit Control’ mode.
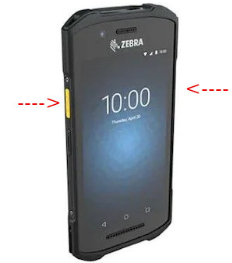
You can now scan a ticket using one of the scan buttons on the side of the device (Zebra, Datalogic).
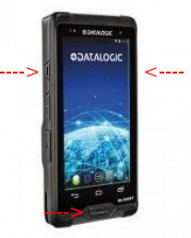
In the case of using a device equipped only with a camera and not a laser, you need to scan using the camera lens.
Validity of entries
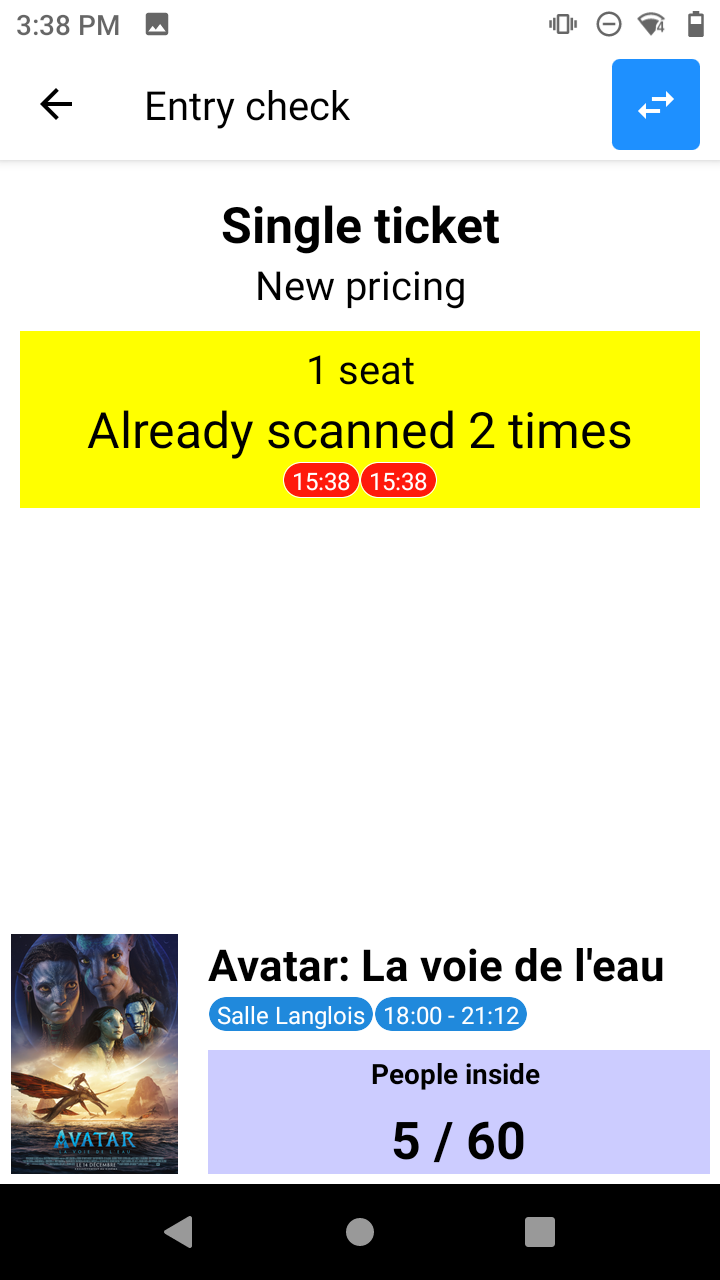
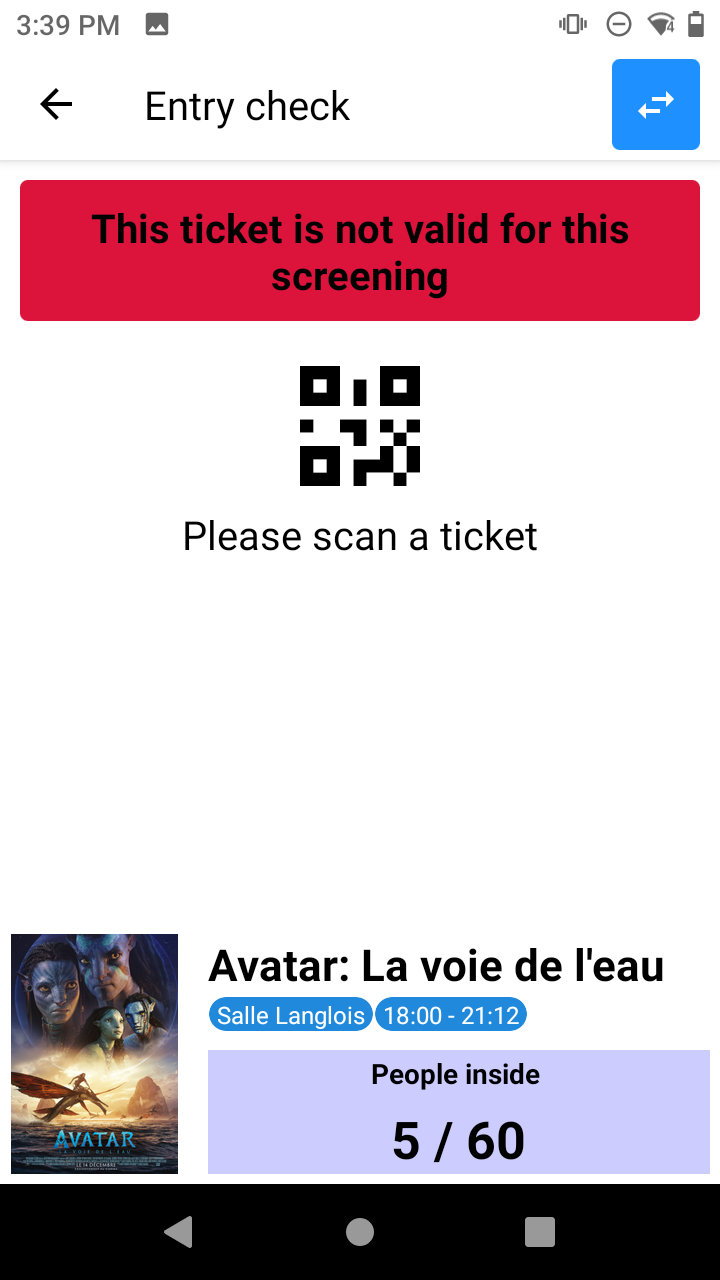
To expedite entry control, the number of steps is minimized, and the displayed result is summarized into the following three possibilities :
-
Vert: valid entry
-
Jaune: the person has already entered (their ticket has already been scanned)
-
Rouge: invalid ticket or reservation
Depending on the ticket configuration, several pieces of information may be displayed, such as the ticket holder’s name, first name, or photo, as well as the fare, eligibility conditions, the number of people in the room, and other possibilities.
If the screen is yellow, the appropriate behavior depends on the organizer’s policy.
Furthermore, individuals using a device configured for entry control do not need a specific user account.